Showing posts with label Spectrum Noir markers. Show all posts

Tuesday, December 10, 2013

Crafter's Companion and CardMaker Magazine Joint Blog Hop

Welcome to the Crafter's Companion 
and 
CardMaker Magazine Joint Blog Hop


So glad to have you here hopping along on our fun blog hop!  There is a ton of inspiration along the way so be sure and hop around to see everyone.


I made this sweet Humphrey holiday card to share with you.  I used one of the cutest stamp sets EVER, the Humphrey's Corner Collection - A Present for You.  I stamped little Humphrey out onto a piece of Ultra Smooth Premium White Cardstock with my Tsukineko Memento ink in Tuxedo Black and colored him with my Spectrum Noir markers in  CR1, CR7, CR8, IB1, IB3, IG1, IG3, IG5, CG1, CG3, CG4, and BT4.  It is just a joy to color with these awesome markers!  


You can win TWO packs of the 6-marker sets of Spectrum Noir markers (Reds and Browns), The Makey Bakey - Christmas Seasons stamp set, The Embossalicious - Mistletoe Moments embossing folder AND a 1 year digital subscription to CardMaker Magazine!  All you need to do is go to the Crafter's Companion Facebook page and enter!

Here is a list of participants in case you get lost along the way:

Thanks for helping to celebrate the holiday season with Crafter's Companion and CardMaker Magazine!  Have fun hopping!!

Until next time...happy scrapping!

Stacy

Entering in Challenges at:
Three Girl Jam - Challenge #30
Theme: 'Tis the Season w/Ribbon
Songbird Challenges - Merry Christmas Everybody

Monday, October 28, 2013

Ornate Butterflies!

Hello my friends!  I'm back from my trip to Arkansas and I'm recovering pretty well from my wrist surgery.  Did you even know I was gone?!~ ha  It has been awhile since I was able to be creative (most of my projects were made before my surgery and trip) so I've been feeling scrappy!  You can imagine my delight when I went out to my mailbox today and found one of the brand spanking new 6" X 6" Embossalicious Embossing Folder - Ornate Butterflies that I received from Crafter's Companion!!


Sadly, my scraproom is a total pit so it took me about an hour or so to dig out my scrap desk! ha  But after I finally found it I got busy making this card.  I started with a sketch challenge from The Sweetest Thing.  The fun sketch along with my gorgeous new embossing folder really got me inspired to create!

Today is a very windy day here in Las Vegas and I opened my window to get a bit of a breeze.  I have a rack of paper over by my window and the wind blew a piece of kraft paper off the rack onto the floor while I was cleaning off my scrap desk.  I took that as a sign I needed to make a card using kraft paper! LOL

(Look how fantastically this folder embosses!!)
 

I made the card base with the kraft paper, then pulled out some orange cardstock from my stash.  I embossed a piece with my lovely new embossing folder and also trimmed some to layer on the card.  I embossed a large piece of this orange cardstock...I might be making another card with it to share soon! ha  It is too pretty to waste!


I have the Bebunni Papercrafting Double Disc CD-ROM and printed out a sheet of custom paper with the sweet little butterflies on it. (love!)


I stamped out the largest butterfly from Sheena's A Little Bit Scenic - Flying Colors stamp set using some Tsukineko Delicata ink in Golden Glitz.  This ink is so yummy! I fussy cut the butterfly out and rolled his wings around a pencil to give him some dimension.  I pulled out my caramel skittles from my friend Carri and added some to the body of the butterfly and to the topper of the card.  I love these so much.  They just make things a little extra special.

For the sentiment I grabbed my Bebunni EZMount Stamp Set - Bebunni Celebration and stamped out "It's Your Day" with my Tsukineko Memento Ink in Tuxedo Black on Luxury Centura Pearl Snow White Cardstock.  Then I colored it with my Spectrum Noir FS3 marker to color coordinate with my papers.  I finished the card with a bit of ribbon from my stash.

Thanks for stopping by today.  Until next time...happy scrapping!

Stacy

I'm entering this in the anything goes plus a stamp challenge at Docerela Creations, and the inspired by-anything goes challenge at Creative Inspiration

Friday, October 25, 2013

Bebunni has Arrived!

Who wants to fall in love?!  When you see this new collection of stamps from Crafter's Companion you will think you have died and gone to heaven!  Today is the launch date for the new Bebunni range of stamps.  They are so sweet you might get a cavity! ha


This month the challenge on the Crafter's Companion Challenge blog was "baby" so I decided to make a baby card. (the "Baby" challenge will be moved to November at Crafter's Companion because of problems during the site upgrade) These adorable bunny images are just perfect for making a card for a new baby.

I decided to step out of my box and make an oval card.  But first I stamped out my image and colored it with my Spectrum Noir markers in TB1, TB2, TB3, PP1, PP2, IG1, IG2, IG3, BG2, and BG3.  I colored my sentiment with TB1 and trimmed it into a banner shape.  I finished it with some faux stitching.

I die cut my colored image out and then die cut my base card out of the next larger oval die.  I wanted to go a bit CAS on this card.  (If you can be CAS with a colored image! ha) I doodled around the image and adhered it to the base card.  Next I made a bow on my Ultimate Tool with a bit of ribbon from my stash and popped up the sentiment with a couple of double sided adhesive square.  All baby cards need a bit of sparkle so I finished with a couple of dabs of Crystal Stickles.

Love it!  Now it is your turn to make a baby card for the Crafter's Companion challenge for November!  You might be the lucky winner of the $30 gift certificate to the Crafter's Companion store!  There will be two challenges in November and two prizes!!  Get your baby card made now so you will have it ready to go! 

Thanks for visiting today.  Until next time...happy scrapping!

Stacy

Tuesday, October 15, 2013

Baby's First Christmas

Hello all!

I'm back today with another sweet, sweet Makey Bakey card.  I'm totally loving these mice!  This one is to celebrate baby's first Christmas.  I used the image from the Makey Bakey Christmas EZMount Stamp Set - Christmas Snuggles.  I colored the image with my Spectrum Noir markers in TB3, TB4, TB5, PP3, PP4, IG1, LG1, TN1, TN2, TN3, TN4, TN6, and Blender pen. 


I embossed a piece of white cardstock with my  6" X 6" Embossalicious Embossing Folder - Let it Snow and layered it behind some pattern paper from my stash.  I stamped out the sentiment and then colored it with my Spectrum Noir markers in TB4 and FS2.  I trimmed it into a flag shape and added it to the card with double sided adhesive squares to raise it up off the card for a bit of dimension.

I finished it up with a bit of ribbon tied into a bow on my Ultimate Tool and a couple of blue glitter skittles.  This is a perfect card for the October "Baby" challenge from Crafter's Companion.  Have you entered yet this month?  There is still plenty of time to join in the fun.  You could be the lucky winner this month! 

Until next time...happy scrapping!!

Stacy

Saturday, October 5, 2013

World Card Making Day Blog Hop!!!

Welcome to the Crafter's Companion
World Card Making Day Blog Hop!
 
 
Hello!!  Glad you found time today to hop along on the Crafter's Companion WCMD Blog Hop! 


I made this fun card to share using my Frou Frou EZMount™ Stamp Set - Shoppe.  I stamped out the images with Tuxedo Black Memento ink onto a sheet of Ultra Smooth Premium White Cardstock.  And then I colored them with my Spectrum Noir Markers in  Dogs - DR5, BG1, BG2, BG3, Girl - FS1, FS4, BG1, BG2, BG3, BF6, BG10, DR5, DR6, PP2, CG2, IG1, Sentiment - IG1.


I embossed a sheet of 6" x 6" Printable Snow White Cardstock using my 6" X 6" Embossalicious Embossing Folder - Gun Metal.  Then I pulled out a scalloped edge die and cut out the center of the embossed sheet. I added some pattern paper and washi tape to the base of the card and then centered the die cut and embossed sheet over them.  I adhered it to the card with double sided adhesive squares to give extra dimension.
 
Now for some good news...
 
Crafter's Companion has got a fun contest for you, and an exclusive coupon: today only (Saturday, 5th October 2013) use the coupon WCMDFB to receive $10 off a $30 order! This is a crafter's holiday... so why not treat yourself to something from your wish list? Visit our website today!
Several of our designers have created cards to share with you, to share some crafty inspiration! Hop over to the Crafter's Companion Blog and see the list of participating designers then hop around to see what they've been working on, then head back to the Crafter's Companion Blog and link up your own projects for a chance to WIN a stamp set of your choice from Crafter's Companion!

How do you win a stamp set? It's easy! Just share as many projects as you like (please make sure you have used at least one Crafter's Companion US product on each entry), created to celebrate World Card Making day (which means they have to be NEW, and posted today or after) and link them on the Crafter's Companion Blog! That's it! You have until Tuesday 9th October to add your link - they will pick one winner and post the announcement on Wednesday 10th October.
 
But wait....that isn't all the good news...
 
If you follow my blog and leave a comment, your name with be thrown in the hat to win four Memento Dye Ink pads - Rhubarb Stalk, Northern Pine, Dandelion and Rose Bud from ME! 


Same rules apply - you have until October 9th to comment and my winner will be announced on Wednesday, October 10th here on my blog.  (my giveaway is open to everyone)
 
Thanks for hopping along today.  Now hop on over to Denise's Blog to continue the hop.  (Or head to the Crafter's Companion Blog)
 
Have fun today!!  Until next time...happy scrapping!
 
Stacy


Thursday, September 26, 2013

Sheena Blog Hop

Welcome to the Sheena Blog hop!! 
 
 
I'm so happy that you had a chance to hop by today and check out the card I made using the new A Little Bit Oriental line of stamps from Sheena Douglass!!  This is such a gorgeous line of stamps!  You are definitely going to want to hop along the whole hop and see all the pretty projects!  To find the links to all of the participants you will need to check out the Crafter's Companion Facebook page.
 
 
I saw this cherry blossom tree stamp and just knew I had to made a card with it immediately!  I colored it with my Spectrum Noir markers in  PP1, PP5, and DR5.  I went very bright and colorful because I wanted it to really pop off the white card.


I'm still channeling my inner embossing diva so I pulled out my 6" X 6" Embossalicious Embossing Folder - Lattice and a sheet of 8" x 8" Printable Snow White Cardstock and embossed it.  I layered it on some bright orange and pink cardstock that compliment the bright happy colors I used on the tree.  I finished up by stamping the sentiment quote and coloring it with my Spectrum Noir marker in PP1.    I thought I was done but then I realized it needed a bit of sparkle and pulled out my Star Dust Stickles. I love how it turned out!!  I hope you do too. 

These fab stamps are available in the Crafter's Companion online store TODAY!
 
Please be sure to hop along to and visit all the girls on the hop and leave a comment because there will be a prize for one randomly drawn commenter AND there will be a prize on Facebook too!  Two great prizes that you aren't going to want to miss out on trying to win!  The Hop will end on Monday, September 30th at 9pm ET.  Winners will be announced on the Crafter's Companion Facebook page on Wednesday, October 2nd. 
 
Here is a list of the designers blogs who will be sharing projects today:
Chrissie Tobas
Christiana Reuling
Denise Coulter
Kendra Wietstock
Leah l'Orange
Mary Dawn Quirindongo
Roxanne O’Brien
Stacy Harper-Watson
Stephanie Severin
Trena Brannon
Tenia Nelson
Deb Felts (Guest Designer)
 
 
Thanks for stopping by and looking today.  Now hop on over to the Crafter's Companion Facebook page to continue on your way through the BLOG HOP.


Sunday, September 22, 2013

Crafter's Companion September Embossing Challenge

Have you entered the Crafter's Companion Embossing Challenge this month?  There is a fantastic prize of a $30 voucher to the Crafter's Companion online store and there is the opportunity to be their Guest Designer for the rest of the year!!  A position which includes some yummy goodies.  SO if you haven't already joined in the challenge you better hurry up!!  Here is what they have to say on the Crafter's Companion challenge site:

"Have you always wanted to be part of our team?  This month we’re doing something a little special, and our design team will be choosing TWO lucky people to be our Challenge Team guest for October, November, and December!  You will receive a package of goodies from either Crafter’s Companion UK or Crafter’s Companion USA (we will be choosing one person from the UK/Europe, and one from the USA) and have your work showcased here on our blog for three months (you will make one card per month)."


Here is a card to inspire you.  I made this beauty with my 6" X 6" Embossalicious Embossing Folder - Gun Metal.  (Yes I'm still an embossing diva!! ha)  I used it to emboss this teal green cardstock and then sanded it lightly to help the pattern show up better.
 

I stamped out the hibiscus from the Sheena's Floral Fantasy EZMount Stamp Set - Wild Rose & Hibiscus with Memento ink in Tuxedo Black and then colored it with my Spectrum Noir markers in  PP2, PP4, PP5, LG1, LG4, LG5, GB1, and GB3.  I just love the soft colors and bling on this card!

Thanks for visiting here today.  Now rush to your scrappy area and get busy making your challenge project!!  ha

Until next time...happy scrapping!

Stacy

Thursday, September 19, 2013

Today is the DAY!

Hello!!  How is your week going so far?  Mine has been good so far.  I can't believe it is already almost Friday!  I have open house at the school of 3 of my children tonight.  They have it set up where you can really only go to one child's classes so I'm not sure which child will be my "favorite" (LOL - jk).  It really seems like poor planning on their part but what can you do?   Part of my busy week was filled with coloring because really what else can you do when you are in love with a new set of stamps! ha

AND I super excited because today is the launch of the new Makey Bakey Mice stamp collection at Crafter's Companion!!  WOOT!  You know I have been obsessing over them this week and today will be no different! ha


I  used the Makey Bakey Mice -Knit & Natter stamp set and colored the image with my Spectrum Noir MarkersBG1, BG3, CG1, CG2, CG4, CG6, GB4, GB6, TN1, TN3, TN4, DR7. 

Again expressing my inner Embossing Diva, I embossed some Luxury Centura Pearl paper with my Embossalicious Embossing Folder - Floral Frenzy.  GORGEOUSNESS!  I love the shine of this paper and with the embossing it is just even more lovely!

 
I stuck with a red, white and green color palette and made a sweet red bow with my Ultimate Tool and some wired red ribbon from my stash of goodies.  I finished it off by custom coloring some clear bling with my Spectrum Noir marker - CG1.   What do you think?  Like it as much as I do? ha

If you are loving these cuties as much as me then go check them out over at Crafter's Companion today!  Thanks for stopping by to look.  Until next time...happy scrapping! 

Stacy

Sunday, September 15, 2013

Makey Bakey Mice for Designed to Color Challenge

Happy Sunday!

I sure hope you have been having a good weekend.  Today I wanted to show you an easel card I made with the new soon to be launched Makey Bakey Mice Stamps.  I made it for the Designed to Color "Anything Goes" challenge #20 with Crafter's Companion that started today.  This is going to be a fun challenge where you are only limited by your creativity!  If you are joining this challenge you must have a colored image on your project.  You have until September 28, 2013 at 12pm MST to enter!


Isn't this mouse just adorable?!  I think these are going to be some of my new favorites from Crafter's Companion.  They will be available at the Crafter's Companion online store starting September 19th.


This stamp is called Home Sweet Home.  I colored it with my Spectrum Noir markers in TN1, TN3, TN4, CR4, CR6, LY1, LY3, GT1, GT2, GT3, DR7.  I've already colored 4 other images so expect to be seeing a lot of Makey Bakey Mice around here!! lol

I'm embracing my inner "Embossing Diva" this month and have been embossing everything I can get my fingers on and this card was no exception! ha  I embossed some green cardstock with my 6" X 6" Embossalicious Embossing Folder - Floral Frenzy to add more flowers and texture to this card.  Speaking of embossing have you joined in on this months challenge at Crafter's Companion?  The challenge is...wait for it....EMBOSSING! ha  There is a fabby prize to win so you should go check it out.

Okay, I'm off to look for some more mice to color!  Enjoy the rest of your Sunday!  Until next time...happy scrapping!!

Stacy

Wednesday, August 21, 2013

Back to School Teacher Card

Happy Wednesday!  (I'm working on an all-happy week! ha)

Last night when I was surfing along Facebook's main feed I came across a free download PDF from Jennifer McGuire Ink for Back to School cards.  They were so adorable that I immediately downloaded all four of the PDF's and got busy making a couple.


She has 4 different versions you can download and one is blank so if you are computer savvy you can add your own sentiment.  Here is another card that I made using the blank version.  I can totally see me making a box of these to give to the teacher as a gift.  They are so fast to make and so cute, right?


The download comes with two apples so you can color one and layer it if you want.  Which is what I did with these cards.  I colored it with my Spectrum Noir markers in TN8, TN2, CR9, BG4, CG2 and CG4.

Don't you just love these cards?  I do, so I had to share. 

I'm digging myself out from under piles of scrap stuff in my scrap room.  As soon as I find myself I will try to get busy making some more new stuff!  Thanks for stopping by today.  Have an awesome Wednesday!  Until next time...happy scrapping!

Stacy

Tuesday, August 20, 2013

What's Your Poison?

Happy Tuesday!

I wanted to show you a card I made using the soon to be launched Sheena's A Little Bit Magical - Knowledge stamp set. 

 
I've been wanting to try working on sticky back canvas so I stamped out my image onto a piece and then colored it with my Spectrum Noir markers in IG2, IG4, IG6, IG9, LY3.  The Spectrum Noir markers colored beautifully on the canvas.  I made sure to be careful when I got close to the edges to control color bleeding. 

I had this bit of yellow ribbon in my stash and I have no idea where I got it but I loved the way it looked around the edge of the canvas so I decided to use it.

I stamped out the sentiment on a scrap of Ultra Smooth Premium White Cardstock.  I colored the paper with my LY3 Spectrum Noir marker and then trimmed it out following the shape of the sentiment.  I used double sided adhesive squares to POP it up off the card.  I finished it off with some clear bling that I also custom colored to match with the LY3 SN marker. 

You need to be on the look out August 22nd in the Crafter's Companion online store for these new stamps from Sheena Douglass because they are fab!  You kind of get the feel of Lord of the Rings or Harry Potter when you look at them.  Now I have you intrigued right?! lol

Thanks for stopping and looking today!  Until next time...happy scrapping!

Stacy

Tuesday, June 18, 2013

Heartfelt Wishes

Hi guys,  What's up? Want to see a card that I made using the Sheena Douglass - A Little Bit Festive - Heartfelt Wishes stamps that just came out today!!  Crazy right?  Holiday cards in June!!   Well my card isn't really very Christmasy.  Here, take a look:


See?  I colored the little bird blue thinking I would pull out some of my Christmas papers in blue to use but then I got lazy and didn't want to go look for my holiday papers! (smile)  So I thought I would just use some of the papers that were sitting by my desk and this is what I came up with to share.


I colored the bird with my Spectrum Noir markers in GG1, GG3, TB3 and TB5.  I added a google eye that was sitting on my desk.  See how lazy I was!? lol  

I have been playing around with my embossing folders and my eBosser.  I saw the most gorgeous card using embossed vellum so I was trying out embossing vellum in my eBosser.  I embossed on some vellum using my Darice - 4.25" X 5.75" Embossing Folder - Honeycomb. It was sitting on my desk also so I thought maybe I should use it on this card.  See, now I'm being economical using my scraps!  ha


I think my card turned out kind of cute.  What do you think?  If you like it you should go check out all the other gorgeous new Sheena stamps in this collection at Crafter's Companion.

Thanks for visiting!  Until next time...happy scrapping!

Stacy

Wednesday, May 1, 2013

Faerie Poppets -Strawberry Patch

Who would like to get a look at the new Faerie Poppet's stamp collection just out from Crafter's Companion?   Well if you said yes, then you are in luck because I plan to show you a project I just made. 


 Here is a photo of my big and bold Faerie Poppet's project.
 
First I stamped out the FAERIE POPPETS - Strawberry Patch Faerie and my sentiment with Tuxedo Black Memento ink on to my Ultra Smooth Premium White Cardstock and colored her with my Spectrum Noir markers using HB1, CR2, CR4, CR6, CR7, CG1, CG2, CT1, IG1, BGR1 and BGR5.
 
For my base card I pulled out a piece of Luxury Centura Pearl 12" x 12" Printable Snow White Cardstock and a large piece of lace. I taped the lace to the front side of the paper. (shiny side). I love this paper! The shiny side is gorgeous all on it's own and a perfect addition to any project but it is also wonderful to just flip it over and use the non-shiny side for all of your multi-media projects. This paper is a perfect weight and holds up to paints, inks and other wet mediums.  


After the lace was taped down, I sprayed the non-shiny side with Purple Pansy Glimmer Mist.


Here is what it looked like dry after I took off the piece of lace. I took this paper and cut it to 8 1/2" x 8 1/2" and adhered it to my white card base.


I punched out the doily using my Martha Stewart Circle Edge Punch (stop back by tomorrow when I take you step by step through this awesome new product) and cut my colored image into a circle that fit perfectly in the center. Sequins are the "in thing" right now, so I grabbed some purple sequins and outlined the circle with them. This really makes the colored image pop. 


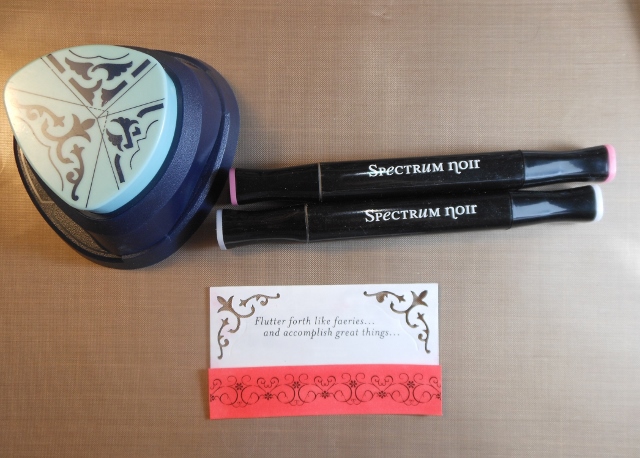
I trimmed my sentiment into a rectangle and used a decorative corner punch. I colored the sentiment with my IG1 and HB1 Spectrum Noir markers. I colored the stamped scroll work with my HB1 and CR6 Spectrum Noir markers. I added some purple sequins to the scroll work for some sparkle.


One thing that I love to do is buy my embellishments in clear or white and then custom color them with my Spectrum Noir markers to match my projects. This is what I did with my flowers. I deliberately went for bold purple highlights using my LV2 marker.


To put together the card, I layered the doily with the image onto my purple lace card base. I tied a red ribbon around the card and adhered my sentiment using double sided adhesive squares to pop it up off the card. To finish I added my brightly colored flowers on two sides of the colored faerie. And there you have it, a great big bold card for a special occasion.   These stamps are available at Crafter's Companion right now.
 
Don't forget we have a new Crafter's Companion "Masculine" Challenge going on now for May.  You could be the lucky winner of the $30 gift certificate to the Crafter's Companion store.  Think of all the goodies you could buy!!!

Thanks for stopping and looking today!!

Until next time...happy scrapping!

Stacy

Tuesday, November 27, 2012

Special Delivery From Me to You!

Welcome to Crafter's Companion!

I want to start with a question. Do you have the Ultimate Advanced Construction Techniques DVD? I have to admit that I have it and I adore it! Whenever I want to make something a little extra special I pull it out and get to work. That is what I have done today. Here is the set of drawers card I made to share with you.


I started by pulling out my Strawberry Kisses - Special Delivery stamp set. I stamped out the image and one of the sentiments bordered by the ornament stamp on each side. I colored them with my Spectrum Noir markers and then fussy cut the main image out and set it aside.

I cut the sentiment into a rectangle and layered it onto some green and then some red card stock. I added some Glossy Accents to the ornaments and some Star Dust Stickles to the letters. Then I set it aside to dry.


While it was drying I got started on my set of drawers card. This project seems complicated but it really isn't that difficult to make. Why don't I walk you though it? First pull out your Ultimate Tool.


Next you will need to cut two 6" x 6" pieces of doubled card stock. Doubling the paper just makes the set of drawers sturdier. Set these aside for now.


Now to make the inner drawers you need to cut your paper 3 1/2" x 4 3/4". Take your Boxer board and put it between the notches on the Ultimate Tool. Align your paper up to the box lid side of the board (handle side). You will score the paper at 5/8" (5th line in) on all 4 sides of the paper. Next fold and burnish the folds.


You will need to cut a "v" notch at each corner, flip the paper over and add adhesive to the notches. Then you would just fold up each side and tuck in each notch to make a box.


To finish off this drawer you will want to make a drawer liner that will measure approximately 3 1/4" x 2 1/8". And also add a "handle" to the drawer front.


For my project, I cut a piece of card stock slightly smaller that the drawer front and adhered it to the drawer front. Then I added some holly with a berry brad as my handle. You could also use a small flower or a small ribbon bow as your handle. You will need to make 4 of these inner drawers.


Now on to the slider which is the sleeve that the inner drawers fit in. You will work on the box base side of your Boxer board this time. Cut your paper 6 1/4" x 3 1/2". Line the short end of the paper (3 1/2" side) up to the hinge side of the board and score at 5/8" (5th line in). Fold and burnish, then line the folded edge up against the box base edge again and score at 2 1/4" (go to 2 inches and the go two lines past). Fold and burnish and place the folded edge up against the edge again and score at 5/8". Fold and burnish and line the folded edge up one last time. Now score at 2 1/4" again, fold and burnish.

Flip the paper over and put adhesive on the last folded bit. Then you just turn it around and adhere the two ends together to make a sleeve. The inner drawer will slip right inside and fit perfectly. You will need to make 4 of these slider sleeves.

Now to put things all together. Grab one of the 6" x 6" doubled papers to use as your base. Next you will adhere the 4 slider sleeves on top. Next you will adhere the second 6" x 6" paper on top.


To finish things off I made an easel card to adhere to the top of the set of drawers. I layered complementary card stock with some patterned paper from my stash. I used my Martha Stewart corner punch. I added some bling, some word stickers and a vellum embellie from my stash. The last thing I did was use that stamped sentiment that I put aside earlier as my "stopper". I put double sided adhesive squares on the back to make it raise up off the page which provides the perfect edge to hold the card open in the easel position.


I really am happy with how it turned out and I am so glad you stopped by to look. Until next time...happy scrapping.