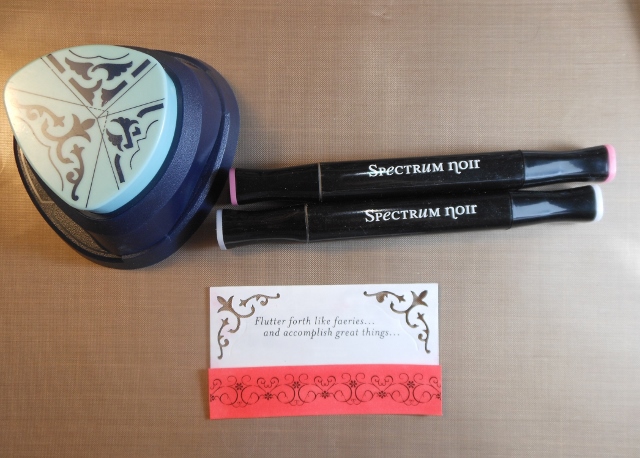
Showing posts with label Martha Stewart Circle Edge Punch Starter kit. Show all posts

Thursday, May 2, 2013

Martha Stewart Circle Edge Punch

I recently purchased the new Martha Stewart Circle Edge Punch starter kit from HSN.

My mother came to visit and I guess she is an avid HSN viewer and was just going on and on about how cool it was. SO of course I rushed to my computer and bought it!! LMBO (yes I have a problem - ha)

ANYWAY, it is super cool. Here is what it looks like all taken apart


You can change out the cutting cartridges very easily. They are sold separately (well mine came with 3 different edge punch cartridges) As soon as I ordered the starter kit my Mom bought me 2 more cartridges at JoAnns! (I'm spoiled I know! ha)


Here are the edge punch patterns I have. Aren't they cool!?!
 
To work this cool punch, you pull out the cutting base from the bottom of the cartridge. It is stored in a plastic cover on the bottom of the edge punch cartridge. (you can see this in the top photo) You push back the lever and easily slide in the plate.


Next you decide what size you want your circle to be. You can make circles from 6 inches to 12 inches. There is a dial on the side and one on the front and you just have to set them both to the number of the size you want. Super easy.


Here is the side dial. (I'm cutting an 8 inch circle)
 
 
Here is the front dial. (Set the number the same here too)
 
Now you cut out a square piece of paper a little larger than the circle you want. I cut mine to 8 1/2 inches and marked the center with a pencil mark.

 
The edge punch cartridge and the front knob are both magnetic. You center the paper under the knob. This is easier than you would think because you can see down inside the knob and there is a crosshatch inside. And the knob attaches to the magnet easily.

 
Then just attach the edge punch cartridge. It will pop on the magnet easily too.

 
Then you just punch and then turn the knob, punch, turn the knob, punch, turn the knob until the circle is punched out.

 
What do you think?? Think you need to own one??

Stacy

Wednesday, May 1, 2013

Faerie Poppets -Strawberry Patch

Who would like to get a look at the new Faerie Poppet's stamp collection just out from Crafter's Companion?   Well if you said yes, then you are in luck because I plan to show you a project I just made. 


 Here is a photo of my big and bold Faerie Poppet's project.
 
First I stamped out the FAERIE POPPETS - Strawberry Patch Faerie and my sentiment with Tuxedo Black Memento ink on to my Ultra Smooth Premium White Cardstock and colored her with my Spectrum Noir markers using HB1, CR2, CR4, CR6, CR7, CG1, CG2, CT1, IG1, BGR1 and BGR5.
 
For my base card I pulled out a piece of Luxury Centura Pearl 12" x 12" Printable Snow White Cardstock and a large piece of lace. I taped the lace to the front side of the paper. (shiny side). I love this paper! The shiny side is gorgeous all on it's own and a perfect addition to any project but it is also wonderful to just flip it over and use the non-shiny side for all of your multi-media projects. This paper is a perfect weight and holds up to paints, inks and other wet mediums.  


After the lace was taped down, I sprayed the non-shiny side with Purple Pansy Glimmer Mist.


Here is what it looked like dry after I took off the piece of lace. I took this paper and cut it to 8 1/2" x 8 1/2" and adhered it to my white card base.


I punched out the doily using my Martha Stewart Circle Edge Punch (stop back by tomorrow when I take you step by step through this awesome new product) and cut my colored image into a circle that fit perfectly in the center. Sequins are the "in thing" right now, so I grabbed some purple sequins and outlined the circle with them. This really makes the colored image pop. 


I trimmed my sentiment into a rectangle and used a decorative corner punch. I colored the sentiment with my IG1 and HB1 Spectrum Noir markers. I colored the stamped scroll work with my HB1 and CR6 Spectrum Noir markers. I added some purple sequins to the scroll work for some sparkle.


One thing that I love to do is buy my embellishments in clear or white and then custom color them with my Spectrum Noir markers to match my projects. This is what I did with my flowers. I deliberately went for bold purple highlights using my LV2 marker.


To put together the card, I layered the doily with the image onto my purple lace card base. I tied a red ribbon around the card and adhered my sentiment using double sided adhesive squares to pop it up off the card. To finish I added my brightly colored flowers on two sides of the colored faerie. And there you have it, a great big bold card for a special occasion.   These stamps are available at Crafter's Companion right now.
 
Don't forget we have a new Crafter's Companion "Masculine" Challenge going on now for May.  You could be the lucky winner of the $30 gift certificate to the Crafter's Companion store.  Think of all the goodies you could buy!!!

Thanks for stopping and looking today!!

Until next time...happy scrapping!

Stacy

Sunday, April 28, 2013

With This Ring

Happy Sunday!

How was your weekend??  We were lucky to get to spend Saturday having a family cookout with some visiting cousins.  Kids spent pretty much the whole time swimming in the pool. (They are back out there right now!!)  It has been a super sunny and warm (90s) weekend.  Really beautiful.  It was really fun to hang with the cousins. 

Today my hubby, two older boys and "the cousins" went to see a movie while I stayed home with the other 3 kids and scrapped.  They went to a new theatre near our house that has fancy reclining chairs.  Super cool theatre!!  They were thrilled with the theatre and the movie they saw.

I was lucky to get to finish up a double page layout of photos from my goddaughter, Michelle's wedding.  I'm a little slow since she was married two years ago but what can I say?  lol  I'm really proud of how it turned out.  What do you think?

 
I used my new Martha Stewart Circle Edge Punch to make the doily type circles.  Her wedding colors were black, white and purple.  I had her write up some information and her feelings from the day and I put it on a hidden tag.


I used some Color Shine in Tinsel and Amethyst to spray the wooden letter that I used for the title. And I was happy to use some of my Purple Twilight Skittles from my friend, Carri.  (Get yours here)
 
 
My goddaughter said she liked it so I'm happy!  I'm entering it in the Anything Goes challenge at Creative Inspirations Paints and at Mema's Crafts Anything Goes Challenge.
 
 
I also wanted to share a card that my 5 year daughter made.  She did all of it except I tied on the ribbon she wanted.  I think it is cute!  She used Sheena Douglass A Little Bit Scenic - Flying Colors stamps.  She was thrilled with how it turned out.
 
Thanks for stopping by today and checking things out.  Until next time...happy scrapping!
 
Stacy