Thursday, November 29, 2012

I'm Off

Hi guys,

What's up?  I haven't been posting as much as I like to lately but be prepared for lots of scrappy goodness in the new year!  Posting more frequently will be my New Years Resolution, along with "make more layouts".  ha

Today I am working on a mini book for my Aunt.  I promised her last year I would make her one and bring it to our annual xmas party reunion.  (which is this weekend! eek!)  So of course I waited until the last second to get started on it.  (I'm leaving tomorrow morning!!! eek!) 

I did some painting on the pages and cover yesterday and got my base papers down.  I printed photos last night (That was a real pain!!  I need a new printer!)  So today it is the down and dirty part, putting it all together and making it sing!  (well not sing literally, just make it look great! ha)  So I will be working on that today probably up until the last minute knowing me.  ha

This year it is only going to be my dd and myself going to the Annual Reunion/Christmas Party.  Is it bad that I'm kind of excited to not be taking all the kids?!  My dd is pretty easy and so it will feel like a mini vacation.  AND I can spend more time hanging with my cousins instead of monitoring 5 kids...  Bad of me, I know.  Now you know...I'm a bad girl! LMAO


In case you stopped by to see scrappy stuff, I made a card for the November "Favorite Colors" challenge at Crafter's Companion and I thought I would share it with you.  I'm not really sure if it qualifies as "favorite colors" because it seems pretty colorful.  But my thought was that the two main colors were pink and green and those two colors are working for me right now.

(update)  For some reason blogger isn't wanting to let me upload photos and I don't have time to worry about it before I leave so you will just have to wait until I get back to see my project.

Thanks for stopping by to see me today. 

Stacy

Tuesday, November 27, 2012

Special Delivery From Me to You!

Welcome to Crafter's Companion!

I want to start with a question. Do you have the Ultimate Advanced Construction Techniques DVD? I have to admit that I have it and I adore it! Whenever I want to make something a little extra special I pull it out and get to work. That is what I have done today. Here is the set of drawers card I made to share with you.


I started by pulling out my Strawberry Kisses - Special Delivery stamp set. I stamped out the image and one of the sentiments bordered by the ornament stamp on each side. I colored them with my Spectrum Noir markers and then fussy cut the main image out and set it aside.

I cut the sentiment into a rectangle and layered it onto some green and then some red card stock. I added some Glossy Accents to the ornaments and some Star Dust Stickles to the letters. Then I set it aside to dry.


While it was drying I got started on my set of drawers card. This project seems complicated but it really isn't that difficult to make. Why don't I walk you though it? First pull out your Ultimate Tool.


Next you will need to cut two 6" x 6" pieces of doubled card stock. Doubling the paper just makes the set of drawers sturdier. Set these aside for now.


Now to make the inner drawers you need to cut your paper 3 1/2" x 4 3/4". Take your Boxer board and put it between the notches on the Ultimate Tool. Align your paper up to the box lid side of the board (handle side). You will score the paper at 5/8" (5th line in) on all 4 sides of the paper. Next fold and burnish the folds.


You will need to cut a "v" notch at each corner, flip the paper over and add adhesive to the notches. Then you would just fold up each side and tuck in each notch to make a box.


To finish off this drawer you will want to make a drawer liner that will measure approximately 3 1/4" x 2 1/8". And also add a "handle" to the drawer front.


For my project, I cut a piece of card stock slightly smaller that the drawer front and adhered it to the drawer front. Then I added some holly with a berry brad as my handle. You could also use a small flower or a small ribbon bow as your handle. You will need to make 4 of these inner drawers.


Now on to the slider which is the sleeve that the inner drawers fit in. You will work on the box base side of your Boxer board this time. Cut your paper 6 1/4" x 3 1/2". Line the short end of the paper (3 1/2" side) up to the hinge side of the board and score at 5/8" (5th line in). Fold and burnish, then line the folded edge up against the box base edge again and score at 2 1/4" (go to 2 inches and the go two lines past). Fold and burnish and place the folded edge up against the edge again and score at 5/8". Fold and burnish and line the folded edge up one last time. Now score at 2 1/4" again, fold and burnish.

Flip the paper over and put adhesive on the last folded bit. Then you just turn it around and adhere the two ends together to make a sleeve. The inner drawer will slip right inside and fit perfectly. You will need to make 4 of these slider sleeves.

Now to put things all together. Grab one of the 6" x 6" doubled papers to use as your base. Next you will adhere the 4 slider sleeves on top. Next you will adhere the second 6" x 6" paper on top.


To finish things off I made an easel card to adhere to the top of the set of drawers. I layered complementary card stock with some patterned paper from my stash. I used my Martha Stewart corner punch. I added some bling, some word stickers and a vellum embellie from my stash. The last thing I did was use that stamped sentiment that I put aside earlier as my "stopper". I put double sided adhesive squares on the back to make it raise up off the page which provides the perfect edge to hold the card open in the easel position.


I really am happy with how it turned out and I am so glad you stopped by to look. Until next time...happy scrapping.

Friday, November 23, 2012

Happy Thanksgiving!

For all of those folks in the USA -
Happy Thanksgiving from me to you!

Tuesday, November 20, 2012

I'm Quackers About You!

I am really loving these new S.W.A.L.K. Pawfect Pals stamps but then again I love all the S.W.A.L.K. stamp sets.   (Seriously!!)  As soon as I received my stamps I got to work stamping out images and coloring with my Spectrum Noir markers.

I have colored so many of these new images it was a bit hard to decide on which one I wanted to feature as my Tuesday Project for Crafter's Companion. But then I realized that I had the perfect image colored for my next anniversary card for my husband. I love it when a plan comes together! So here is a card I made using the Quackers stamp set.


And since the card was made for my anniversary, I thought I should go ahead and make a matching box for my husband's anniversary gift.  


Boxes are so easy to make with the Ultimate Tool. Why don't I show you?


You just start with two pieces of paper the same size.


Then you open up your Ultimate Tool to the inside. Find the side that has the Box Base and Box Lid on it. Then decide how deep you want your box to be by choosing one of the score lines. I started with the box base so I butted my paper up to the side that says Box Base and then I scored on the 2nd line on all 4 sides of my paper. (if you don't have the Ultimate Tool you can measure in about 1 inch and score)


Then you turn the Ultimate Tool around (or not if you don't mind working upside down) and butt your paper up along the side that says Box Lid. Score your paper on the same line as you did for the box base. So for me, I scored on the second line on all four sides of this patterned paper. (about 1 1/8th inch on each side)


Next you fold and burnish all your score lines. Then take your scissors and trim a notch along the score line in each corner. (see photo above)


Now you need to adhere the sides on both the box base and box lid. Flip your paper over with the outside facing up and put glue on the little tabs you made in each corner. I use a wet glue because it gives me time to move things around if I need to.

 
Align the tabs with the sides and hold in place with a paper clip until your wet glue dries.
 
 
I decided finish off my box with a flower that I die cut with my new eBosser. (Shhh don't tell my husband about my new eBosser!) I adore this new machine because it is so easy to use. When you want to make something you just pull out the instruction booklet which has recipes for dies and embossing folders and find the one you need. For my Thin Metal Dies I started with Platform D on bottom, then I added a shim. Next I layered on Platform C, then Platform B. On Platform B, I put my Cutting Die with the patterned paper on top. Finally I put Platform A on top of everything. I turned on the machine and started sliding the boards into the machine until it caught hold and took over for me. It cuts smooth as butter!
 
 
Here are a couple of shapes that I cut out for this project. I cut out 5 graduating sizes and layered them for my flower. I colored a gem with my Spectrum Noir markers to color coordinate and added it to the center of my flower.
 
 
Here is the card and box together. I guess it is a good thing my husband doesn't read my blog posts!
 

Here are the Spectrum Noir markers that I used to color this stamp. It seems like I used most of the ones I own!
Thanks for stopping and looking. Until next time...happy scrapping.

Tuesday, November 13, 2012

Christmas in Mulberry Wood

I have a couple of fun cards to share with you today using some toppers from the Mulberry Wood Classic Christmas Luxury Card Collection. I was lucky enough to get a sheet of these super cute die cut toppers in the mail last week. I love happy mail, don't you?!  I immediately went to work making some cards.


These toppers come in the kit on 8 different sheets with about 7 toppers per sheet. They co-ordinate perfectly with the Mulberry Wood CD-ROM and the stamps sets.

The card making kits also come with 16 foiled and unfoiled card blanks. For these two cards I did not use a card blank because I was actually cleaning off my scrap desk and the last two bits left from my last project were a piece of green pattern paper and a trimmed bit of white card stock.


So in my head I thought, "Hey, why don't I just make a quick card base out of these scraps"? The pieces were almost perfectly sized already so it was really a no brainer.

The green paper was double sided and had green stripes on one side and green polka dots on the other. I took the white card stock and trimmed it a bit shorter on the front that on the back. I adhered the polka dot paper down on the front after gluing down a bit of shimmery green ribbon from my stash.

I pulled the ribbon around and tied it into a bow on the front. Then I opened up the card. I turned my green patterned paper over to the stripe side and trimmed off a bit to fit on the bottom of the inside. It was already starting to look pretty cute even without a topper!

This made me want to go ahead and finish it. And that is when I remembered these adorable toppers...


I grabbed them and immediately saw the one I wanted to use on this card. The sweet Santa topper was perfect.

I used some double sided adhesive squares on the back of the topper to adhere it to the card giving just the right amount of extra dimension. Then I pulled out my coordinating stamp set - Mulberry Wood EZMount Stamp Set - Dreams of Santa.

I used two sentiments from this set for my card. One of them I stamped on a bit of white card stock leftover from when I trimmed down the card front. The other one I stamped on the inside of the card.

To finish this card I trimmed the sentiment for the card front into a flag and then added some bling that I custom colored with a Spectrum Noir marker. Done! Super fun, super quick and super cute!


Later in the week I was finishing up another card for a Sketches4all December challenge, again cleaning off my scrap desk, when I got down to a piece of Pearlescent Blue card stock and some white card stock. I decided to do it again!

I trimmed down the piece of white card stock a bit shorter in the front so that the patterned paper I put along the bottom on the inside would show. This is something I have been obsessing on lately. I'm not sure why but I have a stack of cards to attest to it!


I layered the topper onto the blue pearlescent card stock and the adhered it to the white card base with double sided adhesive squares for dimension. I used a snowflake punch on the bottom edge of the front and then trimmed a thin piece of the blue paper to go over it.

I pulled out the Mulberry Wood EZMount Set - Merry and Bright stamp set and stamped out two of the sentiments. I stamped out one on the inside and then I stamped one onto a piece of snowflake patterned paper that I taped down to the bottom front of the inside of the card.

This sentiment shows with the card closed and when you open the card you can see both of the sentiments. To finish up this card I glued a few snowflakes on to the topper. (leftover bits from punching with the edge punch) Then I rubbed on two snowflakes to the inside. Done!

All of this typing makes it seem like these projects took a long time but they went together so fast and easy and they turned out so super cute! Hopefully you think so too.


My weekend was totally kid oriented.  My ds had his 7th birthday on Sunday and we had a family party at home.  I took him and his siblings for a party at Chuck E Cheeses on Friday after school and they I took the 4 older kids to "movie night" at the elementary school.  They had a blast!  Then on Saturday, my neighbor's twin sons had their birthday party at a bounce place and invited all of my kids.  So that was fun....for them...lol    I'm not sure how my hubby gets out of going to these things...?  :-O  ha
 
For our Monday holiday we mostly did school work projects.  Yeah, I know...not so fun.  But at least we had a whole day to focus on some big projects and get them done without totally stressing out.  See...a totally kid oriented weekend!!
 
Thanks so much for stopping and looking today. Until next time...happy scrapping!!

Thursday, November 8, 2012

Inspired to Scrap

Hi!  I've made a few cards and wanted to share them.  As you will know if you follow my blog, I'm taking a class right now at Online Card Classes - the Holiday Card Workshop.  I love their classes!!  I haven't taken a bad one yet.  I have been so inspired to scrap while taking this class.  So...here are a few of the cards I have been inspired to make.


The first one is a Christmas card that I made using some snowflake stamps and Ranger Distress Ink in Peacock Feathers, Iced Spruce, Shabby Shutters and Tattered Rose.  The sentiment was a freebie in a magazine and I have no idea who it's from (?).  I finished it up with a little Crystal Stickles for sparkle.
 

Next we have a Thank You card using a ton of sentiment stamps.  I'm not totally loving this one but I do like the idea of it.  I will probably it try again with hopefully better results.


And finally here is another Christmas card.  The stamp is one my BFF got me last year for Xmas.  Isn't it sweet?  I used papers from my 6x6 Basic Grey Aspen Frost paper pad.  These papers are so pretty and most of them could be used for other times of the year.  I love that.   I colored this with  my Copic markers.  I ran glue down the top and bottom edge of the colored image and dipped it into glitter.  I'm not sure how well you can see it so here is a close up.

 
I'm not sure if that helped or not.  It looks cute in person.  To finish I used a Martha Stewart edge punch on the red paper and used my corner punch to round the corners.
 
I've been on a roll lately!!  lol  I got some new SWALK stamps last week and I have been coloring away.  They aren't released yet so you will have to wait to see them.  Super cute!!
 
We had a cool down here today in Las Vegas...I think it might be in the 70's!  (woo)  We are so spoiled.
 
Sunday is my ds 7th birthday.  I think we are going to the old stand by, Chuck E Cheeses tomorrow to celebrate.  Then on Saturday all the kids are invited to a bounce place for the neighbor boys birthday party.  Finally on Sunday we will have a family birthday party for him at home.  So it seems like it will be a party filled weekend!! lol Wish me luck... :-O
 
I'm going to enter these in a few challenges but I don't have the list in front of me right now so I add them in a bit.  Thanks for stopping by today.  Until next time...happy scrapping!!

Tuesday, November 6, 2012

Check it out!!! The Ulti-Bag Embossing Board

Hello everyone!  Here is a super fun and easy project I made using my new Ulti-Bags Embossing Board. When it was first introduced recently, I immediately new that I had to order it. Shhhh don't tell my hubby!! lol

I love that it can easily be used in conjunction with my Ultimate Tool or by itself if you aren't lucky enough to own an Ultimate Tool. And it can be stored inside your Ultimate Tool for easy access.

Let's start with a photo of my finished project.


Isn't this the coolest thing? It was so fast and easy to make that I plan to make several of these in holiday colors and put goodies and gift cards inside to give at Christmas. But I get ahead of myself! lol Let's talk about how I made this one.


So first thing I did is I pulled out my Ultimate Tool and sat the board in between the pegs. Then I pulled out some card stock and trimmed it to easily fit on the board. You don't have to do this step but it does make embossing easier. Then I started embossing the shape of the bag I wanted to make. Easy. I didn't have any trouble but if you want you can use the awesome Crafter's Companion Spray and Slide Embossing Lubricant on the back of your card stock. You just spray the back of your paper or card stock, let it dry for approximately 30 seconds and then start embossing. Your embossing tool will simply glide across the surface; giving you a smooth and consistent design.

If you will notice on the board, the bag template I used has two different shaped sides. I decided to use the scalloped side. I embossed that side and the bit in the middle and then just flipped the paper over and embossed the scallop shape on the other side too. (you can click on the photo above to see the board in closer detail)


After embossing the bag shape, I took out my scissors and cut just outside of the embossed line. Then I folded all the embossed lines in the middle.


Next I put a wet glue on the back of the tabs. You can use other adhesive if you want. I used the wet glue because it gave me time to reposition the tabs if I needed to do it.


Finally I folded the bag together, pulling up the side flaps and attaching them to the bag sides. Now all I needed to do was embellish! This board is so awesome! It is double sided with two bag templates and includes co-ordinated tags, banners, swirls and more. For my project embellishments, I decided to use the board for pretty much everything! lol I embossed out the shapes I used on the bag front in graduated sizes in complementary card stock. I also did the same thing with one of the banner shapes to use for the bag closure and I embossed the smallest tag shape to use for my sentiment.


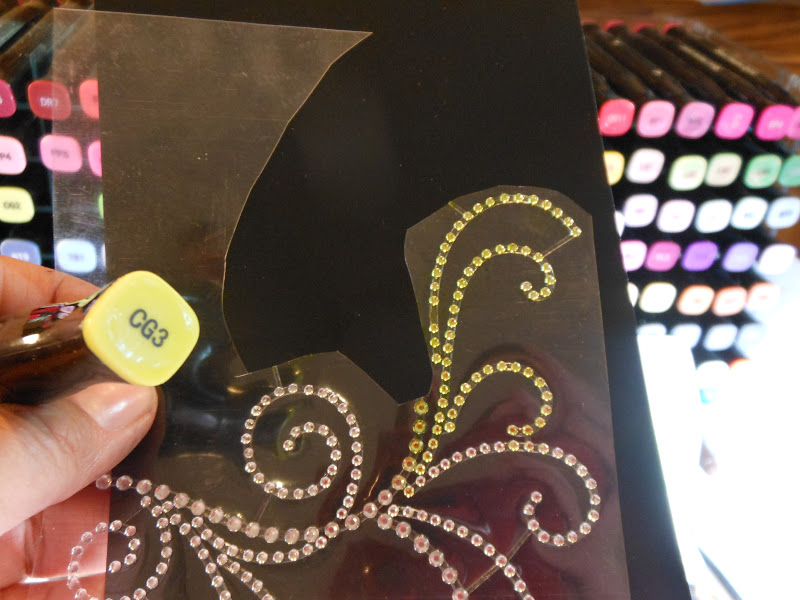
To finish the project I just had a few things to do. I pulled out some bling from my stash and used a Spectrum Noir marker to custom color it to match. Then I added a sparkly green brad from my stash to the enclosure piece and I adhered some velcro for easy opening and closing. The last two things I did were to add a sweet little purple flower by the bling and to hang my sentiment to the bag handle with some ball chain.


And there you have it...my completed project! What do you think??  Like it??


Want to see something else I made?  I decided to work on a Sketches4all tag challenge.  The challenge is to use Metal.  I started with a black tag base.  I stamped and heat embossed a bird image onto it.  Then I pulled out my new Tim Holtz Distress Stains in metallic colors -Tarnished Brass, Brushed Pewter and Antiqued Bronze and randomly rubbed them on the tag.  Then I spritzed the tag with water.  I let it dry.  Next I pulled out my TH Distress ink pad in Peacock Feathers and starting on my craft sheet, rubbed the ink onto the tag with my ink tool.
 
I randomly stamped some stars on the tag and then added some more Distress Stain in Brushed Pewter. You can tell I really liked the silver and blue together. ha   I pulled out some ribbon I have from Michaels that looks like flowers on a roll.  It comes in white so I cut off one of the flowers and used that Distress Stain again to color it to match my project.  I had some lace in my stash in turquoise that I felt worked perfectly so I cut a small piece of it and then I stapled it onto the tag while randomly folding it. (The staples are my "metal" bit)  I adhered my flower on top and then with a Spectrum Noir marker, I colored some peel off border stickers that are edged in silver and used their triangle shapes as the "leaves" for my flower.
 
Finally to finish, I pulled ribbon from my stash for the top and to put along the bottom.  For the top, I lightly brushed over my silver ribbon with my ink took that still had a bit of that Peacock Feathers ink on it.  It was a little too silver and that toned it down and helped it go better with my tag.  The last bit of turquoise ribbon looks like it was crocheted and works perfectly on the bottom of the tag.
 
Now to end.  I want to share with you a little of the craziness I get when I try to get a "pretty smile" from my dd.
 
oops eyes are closed
well I guess one eye is open
oh I'm bored now so I will make a silly face
I finally smile and mom takes a blurry photo!!
 

Okay enough for today.  Until next time...happy scrapping!
 

Sunday, November 4, 2012

Scrap Crazy!

Hi there!!  How's your weekend going?  Did you turn back your clocks last night for Daylight Savings or do you live some place that doesn't observe Daylight Savings?  What are you feelings about Daylight Savings?  I like Daylight Savings and I enjoyed that extra hour this morning...well I would have if my daughter hadn't woken me up.  lol

I was feeling extra scrappy today so I have been camped out in my scrap room for most of the day.   I did my Tuesday DT project for Crafter's Companion then I went to work on some challenges on Sketches4all. 

I did a tag challenge which I will show you on Tuesday (I already added it to the post I scheduled  with my CC DT project).  :-O


After I made the tag, I started on Chery's Holiday Challenge #12 - make a Christmas card.  Easy right?  I'm taking the Holiday Card Workshop from Online card classes and was totally inspired by the class to make this card.  I love their classes!!! 

I made a couple of masks of my stamped image by stamping out the image and cutting away the bits that I needed.  Then I used them on the image I stamped on the card then I colored with my Tim Holtz ink pads. 

Here is one of the masks on top of my stamped image.
Here I am inking the image.
 
I cut another mask that I used for the brown and grey that I used.  After inking with the TH ink pads, I used a Spectrum Noir marker to color the legs of the bird.  And another one to color around the image and to make a bit of a shadow on the ground.  GB10, IG1 and IB1.
 
And following the tutorial from my online class, I trimmed off a bit from one side of the card and then used scrap paper pieces adhered to the inside of the card to peek out from under the cut edge.  To finish, I stamped a sentiment on to the front and also the inside of the card.  Well, almost to finish, I also stamped and heat embossed some snowflakes to the inside too.  And added a bit of crystal stickles to the stars of the stamped inside sentiment. 


And this brings me to the next challenge, Cheryl's Challenge #15 -The inside story.  This challenge is to finish the inside of a card.  I finished out the inside of this Christmas card.
 
I have not been very inspired to be scrappy for awhile so it was nice to get inspired today.  And I don't think I'm done yet!! lol 
 
Thanks for looking!

Thursday, November 1, 2012

Happy Halloween One Day Late

Hey, did you guys have a good Halloween yesterday??  My kids did!   Well, except for my 6 year old son, he made it about halfway down the block when he froze up, crying, asking to go home because he was too scared.  Our neighbors are very creative in their decorating and really just go all out with the scary stuff.  So my brother took the other 4 kids trick or treating and the Riley and I went back home and gave out candy. 

 
Here the kids are in the morning going off to school
 

Here they are getting ready to go Trick or Treating
 

You should try to walk down the sidewalk with a child with his hand over his eyes!! lol  It made it a bit of a challenge.  My oldest daughter took Riley's candy bag with her and trick or treated for him.  So he ended up with a full bag of candy!!  

The 3 little ones had a Halloween Parade at school in the afternoon and since littlest one has morning preschool she wasn't included however when her teacher's afternoon class marched by they grabbed us out of the crowd to join in the fun.  So I was lucky enough to get to walk in the Halloween parade and do all the fun dances that the kids had been practicing for weeks!! (eek!) lol  They had a blast and it turned out great.

Here is one of my kids walking in the parade
 
Starting today, expect to see more creative projects from me because I will be having much more free time to scrap.  WOOT!  Crafter's Companion has gone in a new direction and they have a new Design Team Coordinator ALSO the Crafter's Companion USA Challenge blog was closed AND the UK Crafter's Companion Challenge blog has now gone GLOBAL!  So many changes!!   Crafter's Companion is really a global company so it makes more sense to have it be a bit more centralized with one specific person over all of the Social Media. (blogs, FB, etc)  I will still be on the design team for both sites but just won't have all the extra work.  So it is all good!!   There is a new November Challenge that started up today in fact!  You should go check it out!   They will be sharing my project later in the month. 
 
Okay, enough for now.  Until next time...happy scrapping!