Showing posts with label Ultimate Tool. Show all posts

Tuesday, October 15, 2013

Baby's First Christmas

Hello all!

I'm back today with another sweet, sweet Makey Bakey card.  I'm totally loving these mice!  This one is to celebrate baby's first Christmas.  I used the image from the Makey Bakey Christmas EZMount Stamp Set - Christmas Snuggles.  I colored the image with my Spectrum Noir markers in TB3, TB4, TB5, PP3, PP4, IG1, LG1, TN1, TN2, TN3, TN4, TN6, and Blender pen. 


I embossed a piece of white cardstock with my  6" X 6" Embossalicious Embossing Folder - Let it Snow and layered it behind some pattern paper from my stash.  I stamped out the sentiment and then colored it with my Spectrum Noir markers in TB4 and FS2.  I trimmed it into a flag shape and added it to the card with double sided adhesive squares to raise it up off the card for a bit of dimension.

I finished it up with a bit of ribbon tied into a bow on my Ultimate Tool and a couple of blue glitter skittles.  This is a perfect card for the October "Baby" challenge from Crafter's Companion.  Have you entered yet this month?  There is still plenty of time to join in the fun.  You could be the lucky winner this month! 

Until next time...happy scrapping!!

Stacy

Saturday, August 31, 2013

Last Day of August

Can you believe that today is the last day of August?!  It feels like this month just flew by so quickly.  I wanted to remind you that today is the last day to enter the August "Animal" challenge at Crafter's Companion.

They are giving away a generous gift certificate to their online store to one lucky winner.  Can't you just see yourself shopping?  You still have time to enter so when you finish reading this post go get busy scrapping! ha


To inspire you I have one last card to share for August.  I made this card using the CD-ROM from The Country Diary of an Edwardian Lady.  If you haven't already tried out one of Crafter's Companion's CD-ROMS you should really get one and see what all the fuss is about.  They are chockful of scrappy goodness!  AND so easy to use!

I decided to make a shaped card and just printed out the sheet of the one that I liked the best.  I was drawn to the horses on this one.  After I printed it out twice, I fussy cut out the card itself from one copy and then fussy cut a few of the birds from the second one.  I also printed out a sheet of sentiments and cut out the two I planned to use, one for the inside and one for the outside.

Next I just put it all together.  I layered the extra birds on top of the birds that were on the base card with double sided adhesive squares for a bit of extra interest.  And then I made a bow with my Ultimate Tool and added it to the sentiment that I added to the front of the card.

And voila...I have a very pretty card that works perfectly for this month's Animal challenge at Crafter's Companion!

(See what I did?  I tried to inspire you to join the challenge! ha)

Now it is your turn to go get scrappy.  Thanks for stopping by today.  Until next time...happy scrapping!

Stacy

Thursday, July 25, 2013

Christmas in July at Crafter's Companion

Hello everyone!  This week Crafter's Companion is "officially" celebrating Christmas in July.  They have opened the doors to their Christmas store and you are seriously going to want to check it out.

I'm pretty happy to have gotten one of the new Die'sire holiday Embossalicious embossing folders - Christmas Patchwork and I used it on the card I am sharing with you today.  Isn't this folder gorgeous!? 


I trimmed the base card out of Luxury Centura Pearl Printable Snow White Cardstock.  And then layered some pattern paper and then the embossed paper. 
 
I pulled out some paper from my stash and trimmed out the Christmas ornaments to use as embellishments.  I recently purchased some Bakers Twine from Tim Holtz at my LSS so it was sitting right there on my scrap desk just calling my name. ha 
Have I mentioned lately that I love my Crafter's Companion Ultimate Tool?!  Seriously, I do!  You can do a million things with this beauty but one of the best things about my Ultimate Tool is the bow maker.  And guess what?  This card needs two bows!
 
So of course I grabbed it and got out the pegs from inside of it and set them in the smallest holes since I wanted very small bows. 


Then I just wrapped the twine around the pegs, slipped one end under the twine in the middle and tied a knot.  


Slide it off the pegs and you have a perfect bow!  And as you can see these would work perfectly on my card. (if I was using green! ha)

 
Crafter's Companion will soon be launching some FANTASTIC holiday sentiment stamps called ironically Sentimentals (hehehe).  I used one on this card by stamping it out with Memento Ink in Tuxedo Black onto a scrap of the patterned paper that had been using and trimmed it into a banner shape. 
 
I added it to the card with double sided adhesive squares and finished it off by making some Pearls  on the sentiment banner with my Viva Pearl Pen.  I also just had to add a bit of this luscious stuff to a couple of snowflakes on the embossed paper to make them stand out.  And since I'm addicted to sparkle I put a little Star Dust Stickles on the ornament embellies. 
 

I like how it turned out.  How about you?  Thanks for stopping and looking today.  For more Christmas inspiration check out the Crafter's Companion Facebook page or website.

Tuesday, February 26, 2013

Sending Loving Wishes

Hello everyone.  I hope you are having a nice Tuesday.  The sun is shining here in Las Vegas today.  It is a bit cool but it is nice.  How about you??

I have a new card challenge up at Sketches4all and it is to make an all white card.  Only the sentiment can be in color.  Have you ever made an all white card?  I hadn't until yesterday.  First time for everything I guess.

photographed inside in my light box
photographed outside on the ground
 

To start on this card I pulled out the best white paper I have and that is the Luxury Centura Pearl 8.5" x 11" Printable Snow White Cardstock from Crafter's Companion.  If you aren't already using this paper you need to get online right now and buy some!  You need this paper.  It is the perfect weight, it has a gorgeous shine on one side and is plain white on the other side.  It is great for anytime you need white paper since it is really pretty but you can totally flip it to the plain white side and do those awesome mixed media projects.  It is strong enough to hold up to a bit of paint, ink etc.  And the best part is that is is so inexpensive!  Okay, enough of the sales pitch!  LOL  You can tell I really like it can't you!?  Wait, I forgot to mention something else great about it...it comes in 3 sizes - 8.5" x 11", 12" x12" and 14" x14"!  Now I will shut up. ha


I made a base card and then I trimmed a second piece to be just a bit smaller than the card.  I pulled out my new (shhhh don't tell my hubby! ha) Darice -Wire Fence embossing folder that I just got yesterday in the mail from Crafter's Companion and ran that trimmed piece of paper through my eBosser.  Then I adhered it to the base card. 

Next I grabbed some hearts that I had die cut out previously for another project and didn't use.  (in fact, one of them is the waste from one of my projects!)  I grabbed a Sizzix embossing folder that has swirls and embossed both hearts in my eBosser.  I used double sided adhesive squares to attach them to my card.  Then to finish it off I stamped out with VersaMark ink a sentiment from the recently released Angelica & Friends Collection - Felicity stamp set.  I heat embossed it with some silver Martha Stewart embossing powder I had in my stash.  I stapled on a bit of white ribbon with my Tim Holtz Tiny Attacher and then used a bit of white out to make the staple white.  (hey it worked!) ha  And I had to have a bit of sparkle so I threw on a few clear gems.

What do you think for my first all white card?!  I think it turned out pretty great and it would be perfect for the Crafter's Companion February Love is in the Air challenge that is going on right now!!  You still have a couple of days to enter to win the $30 gift card to Crafter's Companion! 


I have another card to share that I threw together for a friend.  I used the butterflies stamp from the Stamp It Imagine -Time to Dream stamp set.  I adore this stamp and I keep stamping it on everything that will stay still! lol  I used a sketch from Flutterby Wednesday as my inspiration.  I colored the clear bling with my black Spectrum Noir marker.  And I totally can't remember which stamp set I pulled that sentiment from.  I made this card last week and I guess I'm having a brain fart.  It is from Crafter's Companion if that helps...lol


I also have a card that is a Pulley Slider Christmas Card that I made using my Ultimate Tool.  I love to make these cards because they are fun and easy.  You can find step by step directions on making this kind of card on The Ultimate Christmas Project DVD


Okay, this is getting long so I will end here with a photo of my sassy daughter working her cheerleader outfit.  Because everyone can use a smile right??

Until next time...happy scrapping!

Stacy

Sunday, February 10, 2013

Today is the Day!!

Happy Sunday!  I have a couple of projects to share with you today.  Both projects were inspired by my Clean and Simple cardmaking 2 class at Onlinecardclasses.com.  One is a card and one is not... ha

First the card.  On day 10, Jennifer made the cutest card using die cuts and stamps.  I was inspired to use my die cuts and a Crafter's Companion Stamp It Australia EZMount Stamp Set 60 - Friendship Sentiments stamp.


I pulled out a sheet of Luxury Centura Pearl 8.5" x 11" Printable Snow White Card stock and trimmed it down to make my card base.  This is awesome paper that is sold for the beautiful sheen on the front but flip it over and you get a perfectly white, good weight, card stock for doing all sorts of multi media projects at a very inexpensive price. (You should check it out.  It comes in 3 different sizes)

I took the excess and trimmed it slightly smaller than the front of my card base.  Then I grabbed some heart dies from out of my new EZMagnetic EZBinder.  I'm loving this new binder for my dies.  It holds a ton of dies on the magnetic sheets and snaps closed for easy storage.


I die cut two hearts from the Luxury Centura Pearl panel that I had prepared.  I actually layered them, one inside the other.  I kept the smaller heart and tossed the excess paper aside.   So now I have the die cut front panel and a small heart.


The pink heart was just sitting on my scrap desk so I slipped it underneath just to give some contrast so you can see the pieces. The heart with the hole in it can be put aside and used on another project later.
 
I found some gray shimmer paper in my stash and cut it slightly larger than the larger heart shape cut out of the front panel.  I centered it behind the heart on the panel and using a piece of EZRelease Tape, I adhered it on the front of the panel.  Then I turned the panel over and put some adhesive on it and centered it on the card base and pressed down.  After it was adhered to the card base I peeled off the EZRelease Tape. 


I don't want the die cut panel added to the base card just yet because I want to wrap some red ribbon around it and add some double sided adhesive squares to the back so it will stand up off the card.  So I do this next.  Next I pulled out my stamp and stamped my sentiment quote with VersaMark ink and using some red embossing powder.  After I heated it and it cooled I put the double sided adhesive squares on the back and I colored a few clear gems with the CR11 Spectrum Noir pen to color coordinate. 

Now I just added all the different parts to the base.  I centered the front panel and adhered it to the base card.  Then I centered the small heart in the window and adhered it to the gray paper.  I randomly added the colored gems at this point and glued down the bow I made on my Ultimate Tool to the ribbon on the panel.   I'm entering this in the challenge at CAS on Sunday and in the challenge at Come and Get It Challenge Blog.


Next I want to share an altered/recycled project.  My son needed a decorated "mailbox" to put his Valentines in at school next week.  I took an empty cereal box and made sure the bottom of the box was taped shut.  Then I pulled out some shiny black card stock and covered all sides the box and the bottom.  Then I took a piece of that Luxury Centura Pearl 8.5" x 11" Printable Snow White Card stock (I told you I was loving this paper!  lol) and cut it to the same size as the front of the box.  Then I pulled drew a light pencil mark down the vertical middle on backside of the paper. 


I pulled out my Ultimate Tool and my Boxer board.  And using the inches side of the boxer board, I butted the pencil line up to the handle side of the Ultimate Tool and scored at 1 inch, 1/2 inch, 1 inch, 1/2 inch and 1 inch.  Then I flipped the paper and did the same scoring along the other side of the pencil line. There was a little extra bit on the edge and I trimmed this off of both sides. Next, making sure to first fold to the back, I accordion pleated the paper along the score lines burnishing each fold. 


After it was all folded I laid it down on a piece of card stock and put pencil marks to measure the length and width.  I trimmed the card stock down.  Then I added some adhesive to the card stock and a line of double sided adhesive squares down the vertical center.


I grabbed my pleated paper and pressed the edge down along the edge of the card stock.  I turned the paper and lined up the other side of the pleated paper and pressed it down on the other edge of the card stock.  Finally I pressed down from the middle on to the double sided adhesive squares while making sure my pleats were even. 


To make my pleats look like the front of a tuxedo shirt I added 3 brads for "buttons" before I adhered it to the card stock.


There are dies on the market that make a nice bow but I don't have them (yet ;-) ) so I just have to be a little more resourceful.  I cut two pieces of paper about 1" x 8".  I folded one in half and put adhesive on the back in the middle. Then I folded each side to the middle.


Next I trimmed each side toward the center to make more of a bow shape. I took a scrap piece of the same paper to wrap around the middle and adhered it in the back. 


To finish up the bow, I took the second piece of paper and trimmed it down the approximately the same shape (you don't have to do this step) as the bow and then cut the ends into a banner edge.  Then I glued down the bow on top.

 
Here is the other side of the box. 
 
I'm going to enter it in the challenge at Challenge 4 Everybody. That is it for me today.  I hope you weren't bored to tears.  lol  Thanks for hanging around to the end.
 
Okay I'm off because today is the day we get new episodes of ....The Walking Dead!!  I can hardly wait! ha.  I need to get all my kids fed, bathed and in bed by 8pm so that they will be asleep when it starts at 9pm.  
 
Until next time...happy scrapping!!
 
Stacy


Tuesday, January 8, 2013

Stamp It Australia Sneak Peak

I mentioned yesterday that Crafter's Companion was launching a gorgeous new Stamp It Australia stamp collection at CHA in a few days.  Well, I'm happy to share a little sneak peak of one of the stamps here on my blog today.

The stamp I used is from the Spring set and it is a beautiful dragonfly.  I stamped out the image and colored it with my Spectrum Noir markers.  I only used a few - BT2, BT4, JG1, CR1, CR3.  After I colored the image I fussy cut it out and added Star Dust Stickles to the wings for a bit of sparkle.


I pulled out some Kraft paper and made a 6" x 6" card base using my Ultimate Tool.  Then I grabbed my new Graphic 45 -Birdsong paper pad and layered both sides of Cherry Blossom onto the Kraft base.  I stamped out a Happy Birthday sentiment from the same set and made it the focus of my card by matting it with the Cherry Blossom and Kraft paper.  I centered it on the card and used dimensional adhesive squares to adhere it.


When the Stickles dried on my dragonfly, I used the same dimensional adhesive squares to adhere it to the card.  I just cut up a square to fit under the body of the little cutie.  I pulled some pearls out from my stash and made a whimsical flight trail across the card.

I like it and I hope you do too!  Please go check out some more sneak peaks on the other Crafter's Companion DT blogs.  You can find the links on the sidebar at Crafter's Companion.  And there should also be a few peaks on the Crafter's Companion Facebook page.  This is a really awesome stamp release.  You are going to want to add most if not all of these to your stamp collection.  I know I will be! 

Tuesday, November 27, 2012

Special Delivery From Me to You!

Welcome to Crafter's Companion!

I want to start with a question. Do you have the Ultimate Advanced Construction Techniques DVD? I have to admit that I have it and I adore it! Whenever I want to make something a little extra special I pull it out and get to work. That is what I have done today. Here is the set of drawers card I made to share with you.


I started by pulling out my Strawberry Kisses - Special Delivery stamp set. I stamped out the image and one of the sentiments bordered by the ornament stamp on each side. I colored them with my Spectrum Noir markers and then fussy cut the main image out and set it aside.

I cut the sentiment into a rectangle and layered it onto some green and then some red card stock. I added some Glossy Accents to the ornaments and some Star Dust Stickles to the letters. Then I set it aside to dry.


While it was drying I got started on my set of drawers card. This project seems complicated but it really isn't that difficult to make. Why don't I walk you though it? First pull out your Ultimate Tool.


Next you will need to cut two 6" x 6" pieces of doubled card stock. Doubling the paper just makes the set of drawers sturdier. Set these aside for now.


Now to make the inner drawers you need to cut your paper 3 1/2" x 4 3/4". Take your Boxer board and put it between the notches on the Ultimate Tool. Align your paper up to the box lid side of the board (handle side). You will score the paper at 5/8" (5th line in) on all 4 sides of the paper. Next fold and burnish the folds.


You will need to cut a "v" notch at each corner, flip the paper over and add adhesive to the notches. Then you would just fold up each side and tuck in each notch to make a box.


To finish off this drawer you will want to make a drawer liner that will measure approximately 3 1/4" x 2 1/8". And also add a "handle" to the drawer front.


For my project, I cut a piece of card stock slightly smaller that the drawer front and adhered it to the drawer front. Then I added some holly with a berry brad as my handle. You could also use a small flower or a small ribbon bow as your handle. You will need to make 4 of these inner drawers.


Now on to the slider which is the sleeve that the inner drawers fit in. You will work on the box base side of your Boxer board this time. Cut your paper 6 1/4" x 3 1/2". Line the short end of the paper (3 1/2" side) up to the hinge side of the board and score at 5/8" (5th line in). Fold and burnish, then line the folded edge up against the box base edge again and score at 2 1/4" (go to 2 inches and the go two lines past). Fold and burnish and place the folded edge up against the edge again and score at 5/8". Fold and burnish and line the folded edge up one last time. Now score at 2 1/4" again, fold and burnish.

Flip the paper over and put adhesive on the last folded bit. Then you just turn it around and adhere the two ends together to make a sleeve. The inner drawer will slip right inside and fit perfectly. You will need to make 4 of these slider sleeves.

Now to put things all together. Grab one of the 6" x 6" doubled papers to use as your base. Next you will adhere the 4 slider sleeves on top. Next you will adhere the second 6" x 6" paper on top.


To finish things off I made an easel card to adhere to the top of the set of drawers. I layered complementary card stock with some patterned paper from my stash. I used my Martha Stewart corner punch. I added some bling, some word stickers and a vellum embellie from my stash. The last thing I did was use that stamped sentiment that I put aside earlier as my "stopper". I put double sided adhesive squares on the back to make it raise up off the page which provides the perfect edge to hold the card open in the easel position.


I really am happy with how it turned out and I am so glad you stopped by to look. Until next time...happy scrapping.

Tuesday, November 6, 2012

Check it out!!! The Ulti-Bag Embossing Board

Hello everyone!  Here is a super fun and easy project I made using my new Ulti-Bags Embossing Board. When it was first introduced recently, I immediately new that I had to order it. Shhhh don't tell my hubby!! lol

I love that it can easily be used in conjunction with my Ultimate Tool or by itself if you aren't lucky enough to own an Ultimate Tool. And it can be stored inside your Ultimate Tool for easy access.

Let's start with a photo of my finished project.


Isn't this the coolest thing? It was so fast and easy to make that I plan to make several of these in holiday colors and put goodies and gift cards inside to give at Christmas. But I get ahead of myself! lol Let's talk about how I made this one.


So first thing I did is I pulled out my Ultimate Tool and sat the board in between the pegs. Then I pulled out some card stock and trimmed it to easily fit on the board. You don't have to do this step but it does make embossing easier. Then I started embossing the shape of the bag I wanted to make. Easy. I didn't have any trouble but if you want you can use the awesome Crafter's Companion Spray and Slide Embossing Lubricant on the back of your card stock. You just spray the back of your paper or card stock, let it dry for approximately 30 seconds and then start embossing. Your embossing tool will simply glide across the surface; giving you a smooth and consistent design.

If you will notice on the board, the bag template I used has two different shaped sides. I decided to use the scalloped side. I embossed that side and the bit in the middle and then just flipped the paper over and embossed the scallop shape on the other side too. (you can click on the photo above to see the board in closer detail)


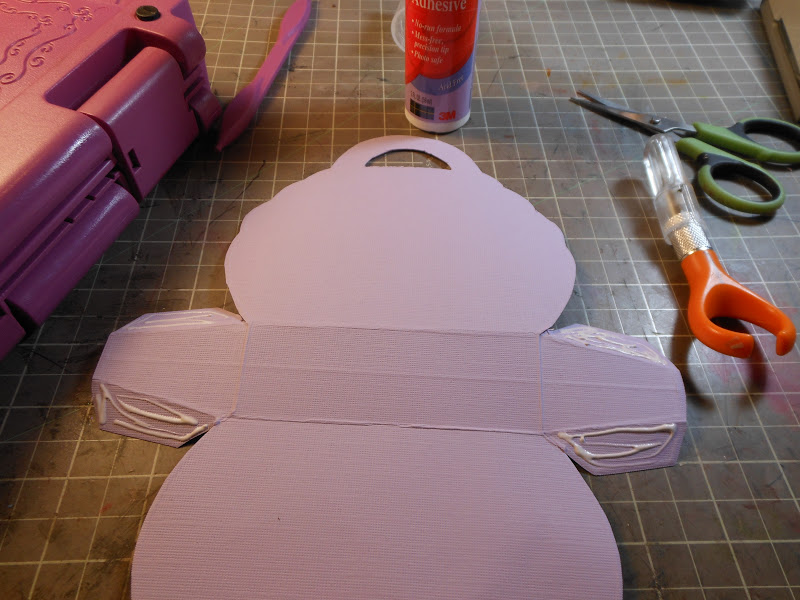
After embossing the bag shape, I took out my scissors and cut just outside of the embossed line. Then I folded all the embossed lines in the middle.


Next I put a wet glue on the back of the tabs. You can use other adhesive if you want. I used the wet glue because it gave me time to reposition the tabs if I needed to do it.


Finally I folded the bag together, pulling up the side flaps and attaching them to the bag sides. Now all I needed to do was embellish! This board is so awesome! It is double sided with two bag templates and includes co-ordinated tags, banners, swirls and more. For my project embellishments, I decided to use the board for pretty much everything! lol I embossed out the shapes I used on the bag front in graduated sizes in complementary card stock. I also did the same thing with one of the banner shapes to use for the bag closure and I embossed the smallest tag shape to use for my sentiment.


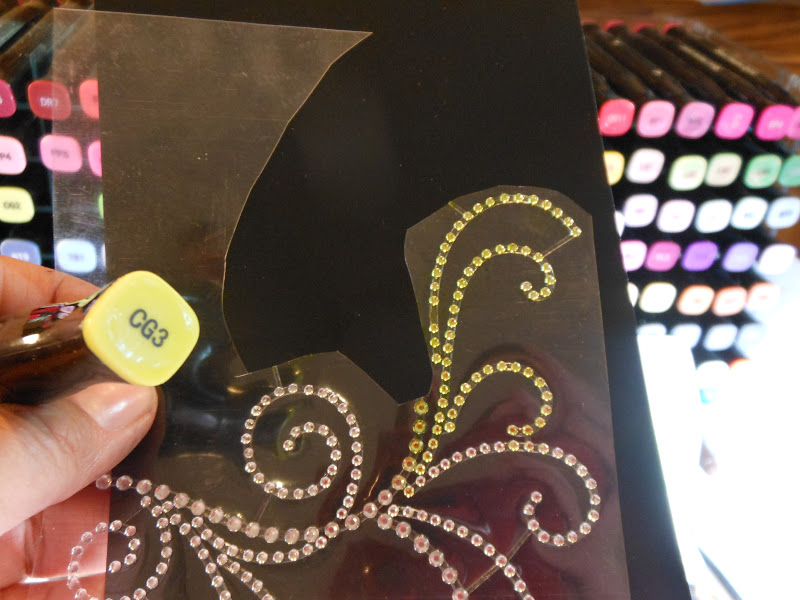
To finish the project I just had a few things to do. I pulled out some bling from my stash and used a Spectrum Noir marker to custom color it to match. Then I added a sparkly green brad from my stash to the enclosure piece and I adhered some velcro for easy opening and closing. The last two things I did were to add a sweet little purple flower by the bling and to hang my sentiment to the bag handle with some ball chain.


And there you have it...my completed project! What do you think??  Like it??


Want to see something else I made?  I decided to work on a Sketches4all tag challenge.  The challenge is to use Metal.  I started with a black tag base.  I stamped and heat embossed a bird image onto it.  Then I pulled out my new Tim Holtz Distress Stains in metallic colors -Tarnished Brass, Brushed Pewter and Antiqued Bronze and randomly rubbed them on the tag.  Then I spritzed the tag with water.  I let it dry.  Next I pulled out my TH Distress ink pad in Peacock Feathers and starting on my craft sheet, rubbed the ink onto the tag with my ink tool.
 
I randomly stamped some stars on the tag and then added some more Distress Stain in Brushed Pewter. You can tell I really liked the silver and blue together. ha   I pulled out some ribbon I have from Michaels that looks like flowers on a roll.  It comes in white so I cut off one of the flowers and used that Distress Stain again to color it to match my project.  I had some lace in my stash in turquoise that I felt worked perfectly so I cut a small piece of it and then I stapled it onto the tag while randomly folding it. (The staples are my "metal" bit)  I adhered my flower on top and then with a Spectrum Noir marker, I colored some peel off border stickers that are edged in silver and used their triangle shapes as the "leaves" for my flower.
 
Finally to finish, I pulled ribbon from my stash for the top and to put along the bottom.  For the top, I lightly brushed over my silver ribbon with my ink took that still had a bit of that Peacock Feathers ink on it.  It was a little too silver and that toned it down and helped it go better with my tag.  The last bit of turquoise ribbon looks like it was crocheted and works perfectly on the bottom of the tag.
 
Now to end.  I want to share with you a little of the craziness I get when I try to get a "pretty smile" from my dd.
 
oops eyes are closed
well I guess one eye is open
oh I'm bored now so I will make a silly face
I finally smile and mom takes a blurry photo!!
 

Okay enough for today.  Until next time...happy scrapping!