Who wants to learn something new today? I have a fun little trick to share with you using some alcohol ink and a can of Compressed Gas Duster (or a straw and your own air blown through it). This is super easy and a lot of fun to do.
.jpg)
Stuff you will need:1. Paper - I used Ultra High Gloss White Cardstock for one card and Luxury Centura Pearl Cardstock on the other one. This technique works best on a shinier surface. You could even use gloss photo paper.
2. Ink - I used a couple of Spectrum Noir alcohol ink refills. But you could use any alcohol ink that you have.
3. A Can of Compressed Gas Duster - I used 3M Dust Remover but you could even use a straw and just blow through it.
4. A Sentiment Stamp - I used Sheena's A Little Bit Sketchy EZMount Stamp Set - Always Floral and Sheena's A Little Bit Sketchy EZMount Stamp Set - Only Words - From The Heart
.jpg)
That's all you need so let's get started. First I trimmed my paper down to a manageable size. I didn't actually trim it down to the exact size I needed because I like to see what I come up with and then trim the paper to include the part I like the best. (smile)(FYI -Alcohol ink dries incredibly fast so you will need to have everything ready to go before you start dripping ink on your paper.)
Next you decide which color of ink you want to work with on your project. I went with super bright colors as you can tell and I used two different types of paper to show you how it looks on each. So play around and see what you like best. This is the fun part!!
.jpg)
(this is ink on the Luxury Centura Pearl )
Here we go with the easy as pie directions - lay down your paper on top of a covered work surface (this can be messy). Then make sure you have your Duster ready to go (or your straw handy) and dip down drops of ink randomly on your paper. Immediately start blowing the drops around with your Duster (or straw). .jpg)
(this is ink on the Ultra High Gloss White)
Next you pick another color of ink and drop it down on the card and blow it with the duster. You can add more colors of ink if you want but I find that 2-3 works best for me. That's it! See how easy it is?! Now you just decide which part you like best and how you want your finished card to look. I decided it was better for me to go very simple since the design I made is so eye popping but if you used more muted colors you could easily work with patterned papers and more embellies.
.jpg)
.jpg)
I decided to stamp my sentiment directly on top of my "art". I used StazOn Ink in Jet Black after my alcohol ink had dried. This ink will take a bit of time to dry or you can heat set it with a heat tool. Stamping the sentiment was one of the last things I did.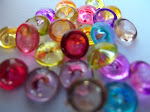
So I made my card base and layered some matting under the "art". Then I stamped out my sentiment. To finish I added some Skittles in coordinating colors. I'm obsessed with these Skittles that my friend, Carri at DoubleClick - AKA Abusybee , makes and sells. I've been using them on all my projects. If you want some for yourself, you can get them HERE..jpg)
( Luxury Centura Pearl)
You can tell by looking at the two cards that on the card using the Ultra High Gloss White cardstock the ink is brighter and the one using the Luxury Centura Pearl cardstock has softer and more muted colors. You can tailor your project by the papers and ink colors you use.
Have fun with it!!
Until next time...happy scrapping!
Stacy
What an awesome technique!! The colors have really come out bright and beautiful with the high gloss paper..love it..:) definitely going to try this one..thanks for sharing:)
ReplyDeleteWow! Look how fun this is!! I love the colors you used! I sent you a super long and boring email last night! Carri~Abusybee
ReplyDeleteDid I see a unicorn and an angel fish??????? Looks like lots of fun....
ReplyDeletevery cool!
ReplyDeleteSo so so cool, I love this technique! Love the bright colors you used here :)
ReplyDeleteWhat a fun idea!!! I bet it's easier with compressed air than a straw. Unless you are full of hot air. Lol. Beautiful colors you chose too.
ReplyDeleteThis is gorgeous, Stacy!! Thanks for the great tutorial!
ReplyDelete